
Uncategorized
Installing an All-in-One Kitchen in Your Camper Van
May
Installing an All-in-One Kitchen in Your Camper Van
Designing a functional van interior comes down to one thing: efficiency of space. Few upgrades transform a build faster than installing an all-in-one kitchen. Whether you’re building a weekend rig or a full-time home on wheels, a properly installed kitchen system brings comfort, organization, and serious usability to your setup.
Let’s break down what it takes to install an all-in-one kitchen—and how to do it right the first time.
Why Choose an All-in-One Kitchen?
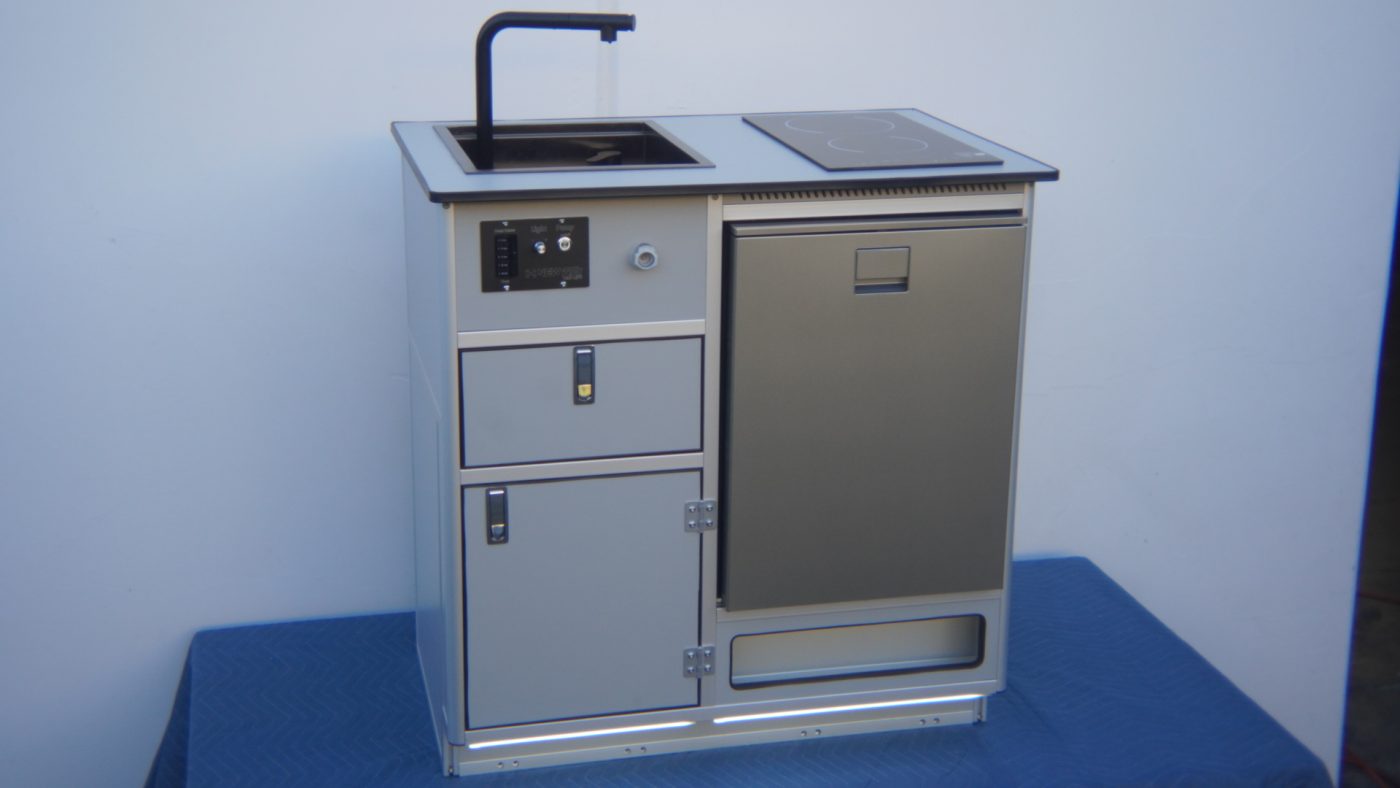
An all-in-one kitchen unit combines your essential components into a single, compact system:
- Sink
- Countertop
- Storage
- Optional stove or fridge space
Instead of building everything from scratch, you’re installing a pre-designed, space-efficient module that’s ready to go.
Benefits:
- Faster install time
- Clean, professional look
- Optimized layout
- Fewer design mistakes
- Easier future upgrades
Planning Your Kitchen Layout
1. Location Matters
Most van kitchens are installed:
- Behind the driver seat
- Along the passenger wall
- Near the sliding door for ventilation and access
Make sure you consider:
- Walkway clearance
- Bed layout compatibility
- Door access
- Window placement
2. Measure Twice (Seriously)
Even pre-built kits need proper fitment. Measure carefully:
- Floor width
- Wall curvature
- Height clearance
- Door and drawer clearance
Tools & Materials You’ll Need
- Drill and drill bits
- Rivnut or plusnut tool
- Stainless hardware
- Level
- Tape measure
- Sealant
- Anti-seize lubricant
Step-by-Step Installation
Step 1: Test Fit the Unit
Place the kitchen unit in position and verify alignment, clearance, and level. Use shims if necessary, as van floors are rarely perfectly flat.
Step 2: Mark Mounting Points
Mark all mounting locations. Use factory holes when possible and avoid drilling into wiring or fuel lines beneath the van.
Step 3: Secure the Kitchen
Install rivnuts or plusnuts and secure the unit using proper hardware.
- Tighten evenly
- Avoid overtightening
- Use lock washers or thread locker
A solid mount is critical for both safety and long-term durability.
Step 4: Install Plumbing
If your unit includes a sink, install:
- Fresh water tank
- Grey water tank
- Food-grade water lines
- 12V water pump
Ensure all plumbing is secured, accessible, and protected from abrasion.
Step 5: Electrical Connections
Connect any powered components such as pumps, fridges, or outlets to your system. Many builders integrate with EcoFlow Power Kits for a simplified wiring solution.
Step 6: Final Fit & Finish
- Check all hardware
- Test drawers and doors
- Run water system
- Verify electrical operation
Pro Tips from the Shop
- Ensure proper ventilation if using a stove
- Keep weight low and centered
- Use anti-seize on stainless hardware
- Plan access for maintenance
- Leave room for future upgrades
Common Mistakes to Avoid
- Drilling without checking underneath the van
- Poor access to plumbing or wiring
- Unbalanced weight distribution
- Using incorrect hardware
- Not planning for upgrades
Final Thoughts
Installing an all-in-one kitchen is one of the most impactful upgrades you can make to your camper van. It transforms your build into a functional living space while saving time and complexity.
Take your time, plan carefully, and build it right the first time.
Ready to upgrade your van? An all-in-one kitchen is a major step toward a more capable and enjoyable setup. 🚐🍳